REVIEW · ISLAND OF HAWAII
Hawaii: Volcanoes National Park E-Bike Rental and GPS Audio
Book on GetYourGuide →Operated by Bike Volcano · Bookable on GetYourGuide
Volcanoes hit different on two wheels. This e-bike ride lets you trace the active-crater rim at a pace that makes the whole park feel doable, not exhausting. You’ll pedal through native rainforest, then switch up to volcanic heat, lava-tube steps, and viewpoints like Kīlauea Overlook—all guided by turn-by-turn audio on your phone.
I especially love two parts. First, you get the convenience boost of an electric bike while still following permitted bike trails, so you can focus on sights instead of fitness math. Second, the mix of stops—steam vents, a lava tube walk, and paved routes to lava viewpoints—creates a true “how volcanos work” flow instead of a random checklist.
One thing to consider: this tour depends on a smartphone working with the included GPS audio app. If you’re not into app navigation (or your phone battery is a gamble), you’ll want to plan extra care.
In This Review
- Key highlights worth your attention
- Two wheels, one erupting volcano: why this e-bike tour works
- Bike Volcano setup: parking, helmets, and the quick safety reset
- Finding your way with GPS audio: what the app does (and what you should prep)
- The rainforest bike trails: how the heat-and-green contrast feels
- Steam vents and volcanic heat: where the science turns into a sensation
- The lava tube walk: feeling the force below ground
- Kīlauea Overlook and the Summit: how you might see active lava
- Road etiquette on a busy day: staying safe without killing the fun
- What you pay and what you still need to budget
- Who this fits best (and who might be happier elsewhere)
- Should you book this e-bike volcano loop?
- FAQ
- How long is the Hawaii Volcanoes National Park e-bike tour?
- Where do I meet for the tour?
- What’s included with the rental?
- Do I need a park pass?
- Do I need a smartphone for this experience?
- What should I bring and wear?
Key highlights worth your attention
- GPS Audio App: voice turn-by-turn navigation on permitted bike trails, with multi-language audio (English, French, German, Japanese)
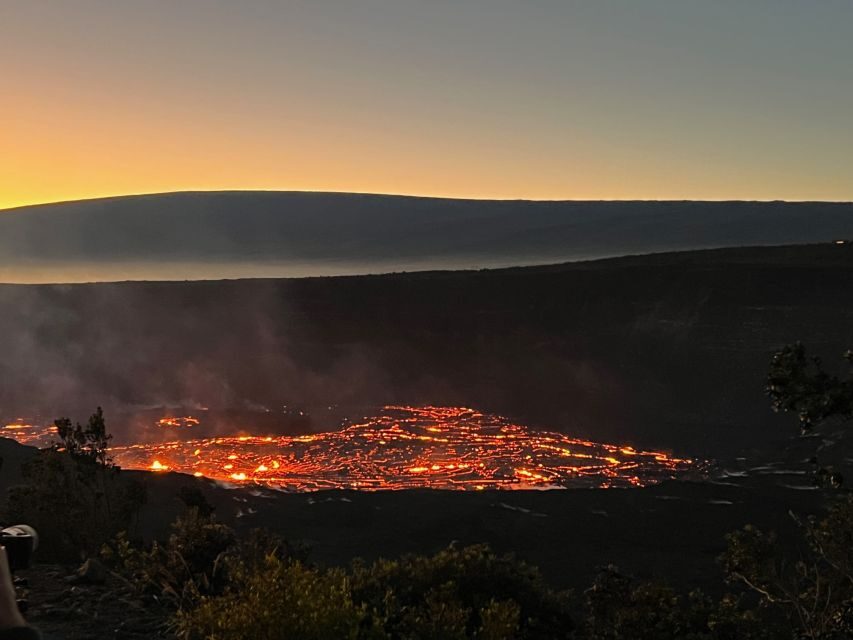
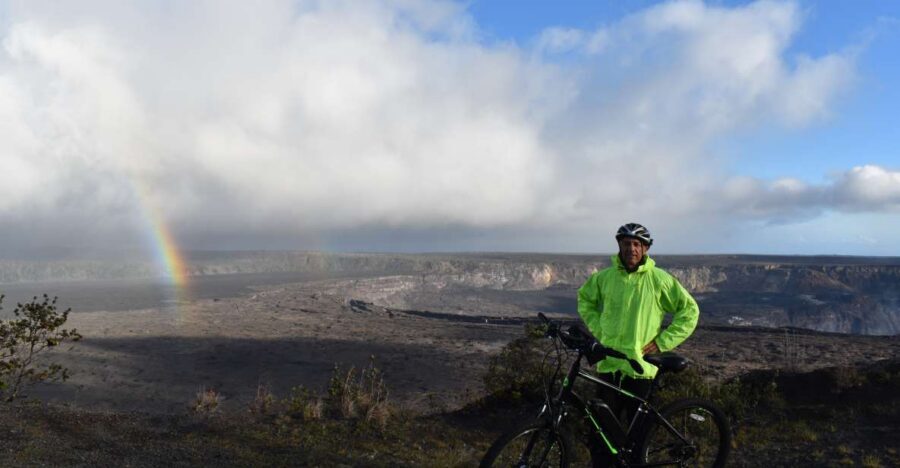
- Active volcano rim riding: a chance to see active lava from lookout areas, depending on conditions
- Volcanic heat moments: steam vents that make the heat feel real fast
- Lava tube walk: an in-your-body experience that’s different from standing outside looking in
- Less crowding and less walking: you skip the slow, parking-and-foot-traffic grind for major highlights
- Live human support: phone help while you ride your self-guided route
Two wheels, one erupting volcano: why this e-bike tour works
Hawaii Volcanoes National Park is big. On foot, it can also be a test of patience. On an e-bike, the park becomes something you can actually experience in a single half-day without turning the trip into a legs-and-lunch mission.
This is a rim-focused ride, which matters. You’re not just passing by volcano scenery from one safe viewpoint; you’re moving along the permitted bike routes that connect the main highlights. The goal is simple: feel the drama of an active landscape while keeping your day controlled—start when you want, stop when you spot something interesting, and move on without crowds stealing your time.
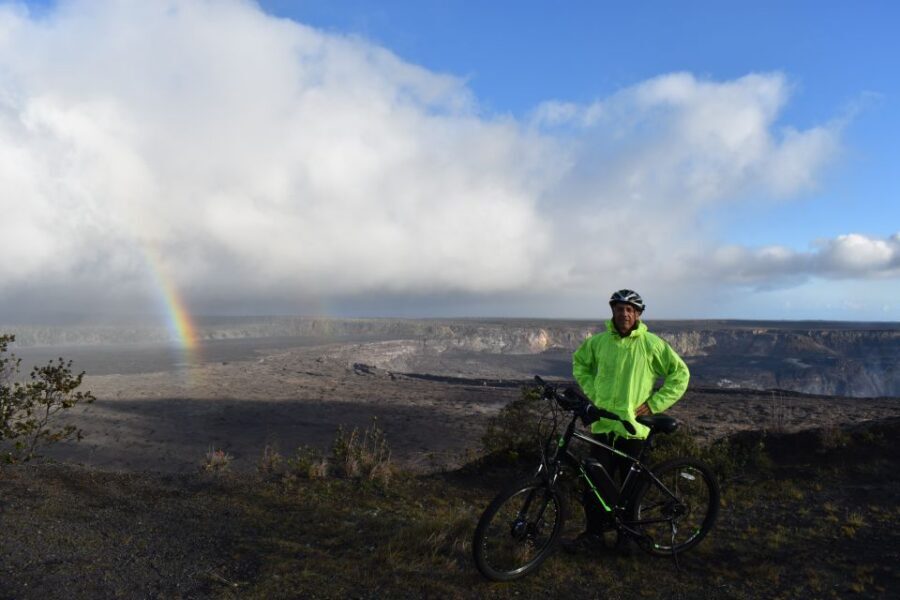
And yes, there’s real excitement here. The plan includes places where you might see active lava, plus stops where you can sense heat coming from volcanic activity. That combo—motion + sensory moments—tends to stick with you longer than a single lookout photo.
Other Volcanoes National Park tours in Island Of Hawaii


Bike Volcano setup: parking, helmets, and the quick safety reset

The tour starts at Bike Volcano headquarters in Volcano Village. You park there first (they offer secure parking), then pick up your hybrid e-bike around 9:30 AM. The site also has restrooms, a general store, and a restaurant, which makes the start feel less chaotic than typical “meet somewhere outside” tours.
Before you roll, you’ll be fitted with the e-bike and helmet, plus you get practical gear like a bike bag and a bike lock. You also get a safety lecture under the canopy staging area. That short reset is worth it because you’ll be mixing trail riding with stretches of road.
One helpful touch: there’s live human phone support during your journey. That’s not just a feel-good line. It means if the app route is confusing or you run into a problem, there’s a real person you can reach instead of being stuck playing phone chess on the side of a volcanic road.
Finding your way with GPS audio: what the app does (and what you should prep)
Your ride is self-guided, but not self-guessing. The included GPS audio app is built for voice turn-by-turn navigation on permitted National Park bike trails. It guides you from Volcano Village into the park and helps you reach the main highlights.
The audio guide is available in multiple languages: English, French, German, and Japanese. That’s a big plus if you’re traveling with a mixed-language group or you just want the extra options.
One caution: the phone app experience can be imperfect. A previous rider noted the audio/map navigation was a little hard to use. The good news is that the trails and paths are generally easy to find, and there are plenty of maps along the way to follow. Still, your best strategy is to treat this as “navigation on a phone,” not “trust the bike and wander.”
Practical prep you can do before you start:
- Bring a working smartphone and plan for enough battery to last the ride.
- Make sure you can access the map/audio view easily while riding (or stop briefly when needed).
- Wear closed-toe shoes and keep your gear simple so you’re not fumbling with straps and pockets.
The rainforest bike trails: how the heat-and-green contrast feels

After the initial roll-in, your route runs through lush native Hawaiian rainforest using bike trails. This is one of the smart reasons to do the e-bike version: the assist makes it easy to keep moving at a relaxed pace, so you can actually notice changes in terrain and temperature as the volcanic activity gets closer.
You’re not just collecting scenery. You’re building contrast:
- Cooler, greener trail segments
- Then heat coming up from volcanic features
That transition can feel almost physical. When you reach the steam vents, the warmth stands out fast. Even if you’ve read about volcanoes before, it’s different to be close enough to feel the heat and smell that volcanic air.
If you’re hungry, there’s an option to have lunch mid tour at the Volcano House’s Rim Restaurant. That stop can break up the day nicely without forcing you to abandon the route plan.
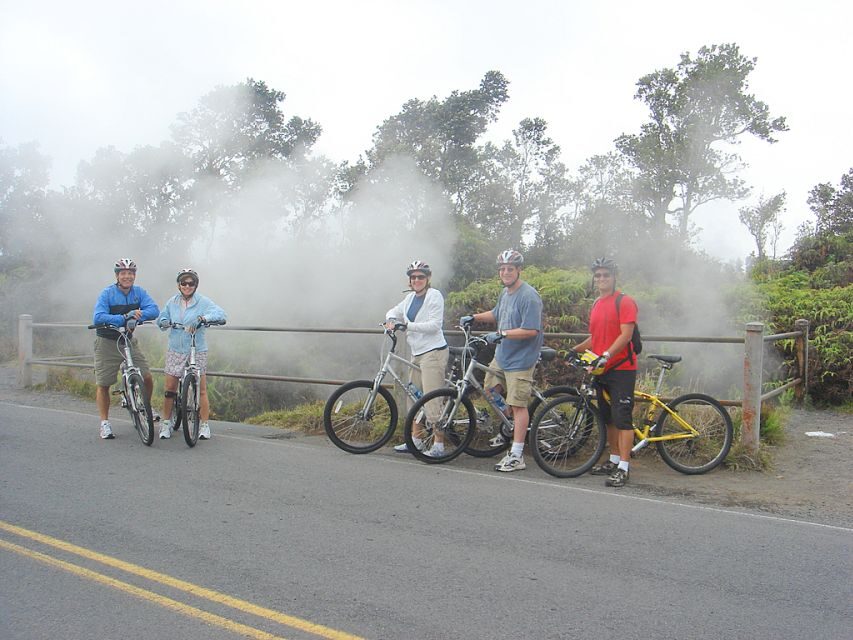
Steam vents and volcanic heat: where the science turns into a sensation
Steam vents are one of those “you had to be here” points. From the bike, you reach them on permitted routes, and the experience is timed as part of the overall flow rather than as an isolated detour.
What makes this stop valuable is how quickly it changes your understanding. Lava is one thing, but heat release through steam vents is another. You’re getting a direct sense that the landscape isn’t just dramatic—it’s active and working underneath your feet.
Wear warm clothing. Even in the right season, a volcano can feel cooler in motion and warmer near vents. Also bring rain gear if the weather turns. You’ll be outside for the ride, and the park can shift fast.
Other ATV and off-road tours in Island Of Hawaii

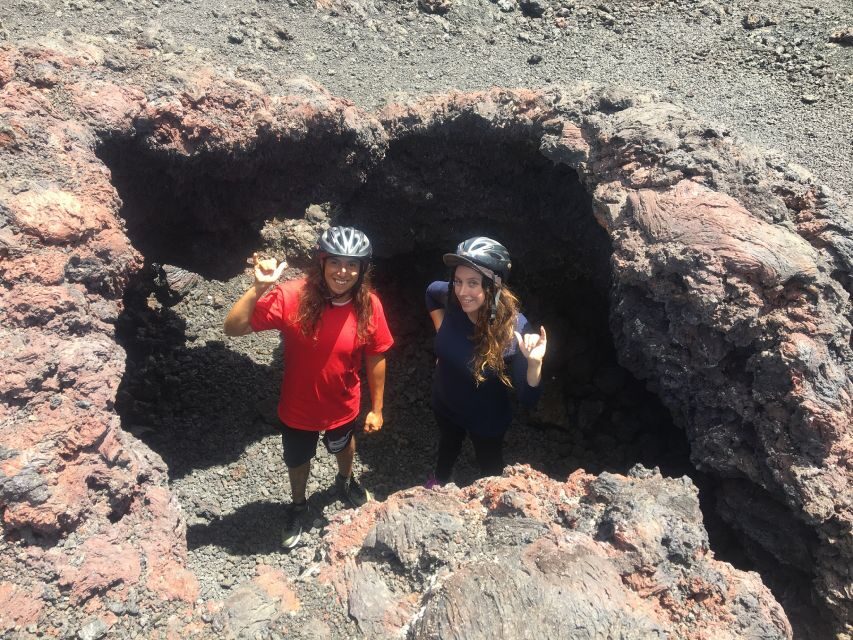
The lava tube walk: feeling the force below ground

A lava tube stop adds variety and a little wow factor. You’ll walk through a lava tube as part of the tour, which changes the whole tone of the day.
Outside, volcano activity often feels like open drama—views, heat shimmer, and wide horizons. Inside a lava tube, it’s tighter. You’re moving through a volcanic structure shaped by past flows, and the change in environment makes the geology feel close-up.
Even though details like how long the tunnel walk is aren’t specified here, the key idea is clear: you get a different kind of volcano experience beyond viewpoints. Pair that with the steam vents and you’ve got both “outside heat” and “inside structure” in one loop.
Basic foot rule: closed-toe shoes only. No sandals or flip flops, and no slippers. You’re on a working landscape, so your footwear should be confident and steady.
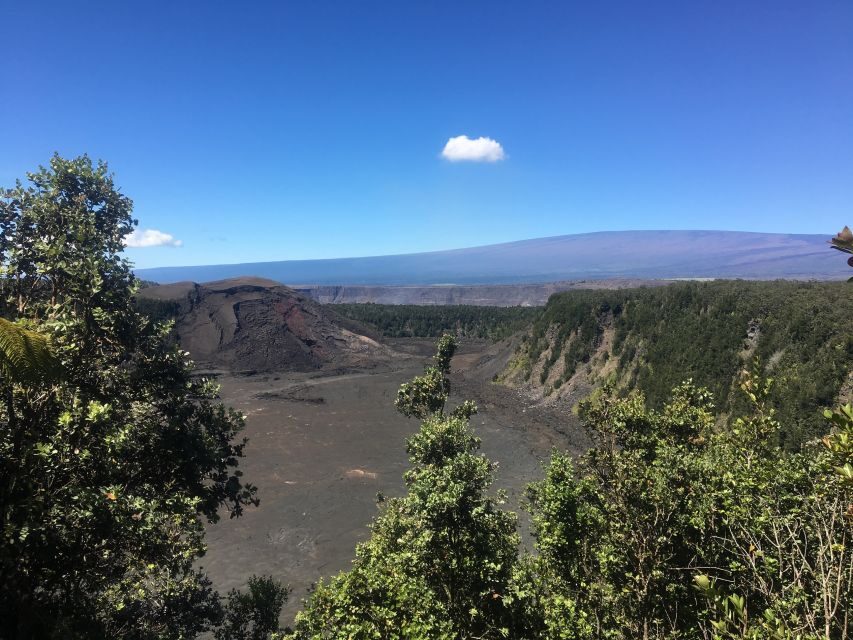
Kīlauea Overlook and the Summit: how you might see active lava
The route aims to reach Kīlauea Overlook and the Summit of Kīlauea for views where you might see active lava. It also includes a stop at the lava viewing area and e-bike along paved bike trails and roads.
This is the heart of the promise, but it’s also the part you should take with realistic expectations. Active lava visibility can depend on conditions, time of day, and what’s accessible. The tour frames it correctly: you might see active lava. In other words, you’re not guaranteed a specific sighting, but you’re going to the right places designed for viewing.
What you’ll appreciate is the combination of effort level and payoff. Getting to prime viewpoints by foot can involve long walks and lots of congestion. Here, the e-bike helps you cover the distance without turning it into a slog, so you have more time for looking, not just getting there.
Road etiquette on a busy day: staying safe without killing the fun
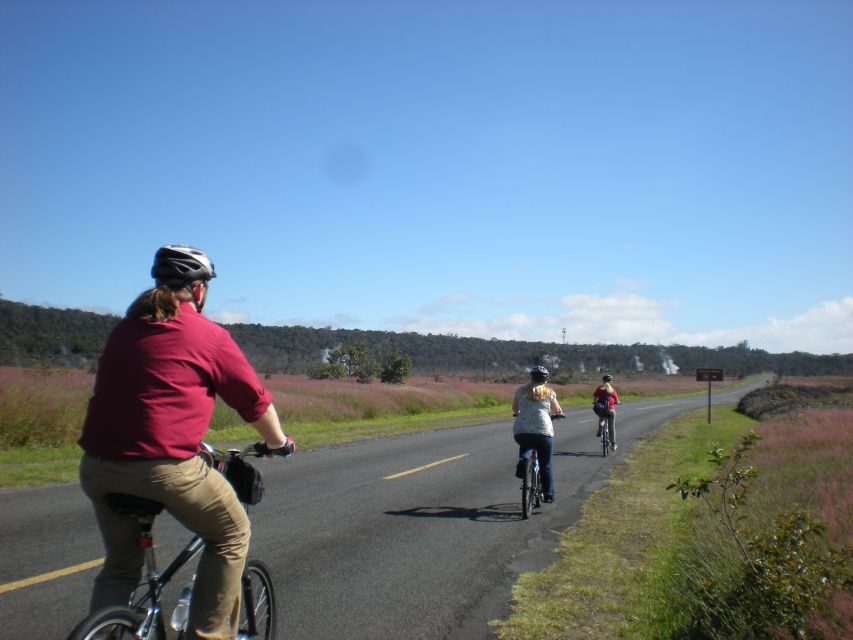
A downside of any park-adjacent e-bike plan is that you can end up mixing bike routes with road segments. One rider described highways as busy and a bit scary at first, mainly because cars can be impatient.
Here’s the practical takeaway: follow the bike rules and stick to the sides of the road, and you’ll usually be fine. That same review pointed out that vehicles tend to be accommodating when bike riders stick to regulations and position correctly.
Also, the tour provides your helmet and a bike lock, and you’re starting with a safety lecture. That’s not extra fluff—it sets up safer choices when the road sections appear.
What you pay and what you still need to budget
The price is $159 per person for about 4 hours. On its face, that’s not “cheap,” but it’s not just a sightseeing fee either. You’re paying for:
- Hybrid e-bike rental
- Helmet
- Bike bag and bike lock
- Safety instruction
- Free GPS audio app
- Secure parking and restrooms at the meeting point
- Live human phone support
What’s not included:
- A Hawaii Volcanoes National Park pass
- A smartphone (required for the app)
- A few optional extras: backpacks can be rented for $5, and a rain jacket is available to purchase at the Kīlauea General Store
There’s also an equipment security deposit of $1500. That’s something to plan for if you’re tight on available credit. It’s common for rentals, but it’s still worth treating as a real part of your trip cost/commitment even if it’s refundable.
Value-wise, this tour shines if you want to see major park highlights without doing the heavy lifting of parking logistics and long walking days. One strong review theme was exactly that: easier park access, fewer crowds to deal with, and a smoother route around the highlights.
Who this fits best (and who might be happier elsewhere)
This isn’t an ultra-strenuous experience. One rider even noted it felt not too strenuous and was easy to manage at your own pace. That makes it a good option if you want volcano sights without turning your day into a fitness test.
It’s also a great fit if you:
- Like self-guided exploring with structured navigation
- Want to minimize crowds and walking time
- Prefer spending your energy on views and stops instead of logistics
It’s not suitable if you:
- Are bringing a child under 15
- Are pregnant
- Weigh over 250 lbs (113 kg)
- Don’t want to rely on a smartphone for the GPS audio app
If you’re in the gray zone, the rule of thumb is simple: if you’re comfortable with phone navigation and you can handle mixing bike riding with short road moments, you’re in the right place.
Should you book this e-bike volcano loop?
Book it if you want a half-day plan that balances big volcano payoff with less hassle. The combination of e-bike coverage, turn-by-turn GPS audio, and real stops like steam vents and a lava tube makes this feel like more than a casual rental. It’s a practical way to see active-volcano highlights while keeping the day controlled and not overly exhausting.
Skip it if smartphone navigation sounds like your least favorite activity, or if you need a car-free, fully carless route plan. Also think twice if you’re uncomfortable with shared road segments; you can mitigate that by following rules and riding defensively, but it’s still part of the experience.
If the idea of possibly seeing active lava from the right viewpoints excites you, and you’d rather glide to sights than fight crowds, this is a strong match.
FAQ
How long is the Hawaii Volcanoes National Park e-bike tour?
The duration is 4 hours.
Where do I meet for the tour?
You meet at Bike Volcano headquarters in Volcano Village. The setup includes secure parking and restrooms, and you should look for the white canopy at the north end of the rear parking lot.
What’s included with the rental?
The package includes a hybrid e-bike rental, helmet, bike bag, bike lock, safety instruction, and the free GPS audio app. Secure parking and restrooms are also included, along with live human phone support.
Do I need a park pass?
No park pass is included. You’ll need the Hawaii Volcanoes National Park pass on your own.
Do I need a smartphone for this experience?
Yes. A fully functioning smartphone is required because the free GPS audio app is part of the tour.
What should I bring and wear?
Bring a valid ID or passport, warm clothing, sunglasses, sun hat, camera, credit card, sunscreen, and rain gear. Closed-toe shoes are required, and sandals or flip flops and slippers are not allowed.